


By a Practicing Software Architect | April 2026
Introduction: Why Textual Analysis Matters in Modern Software Design
As someone who has spent over a decade bridging the gap between business requirements and technical implementation, I’ve always believed that the hardest part of software development isn’t writing code—it’s understanding what to build. Too often, requirements arrive as dense paragraphs of natural language, leaving developers to decipher intent, identify entities, and model relationships without a clear methodology.
That’s why I was genuinely excited to try Visual Paradigm’s tutorial on transforming problem descriptions into UML models using Textual Analysis. This guide walks through a realistic scenario—Saturn International’s car park security system—and demonstrates a structured approach to extracting classes, relationships, and interactions from plain English.

In this review, I’ll share my hands-on experience following the tutorial step-by-step, highlight what worked exceptionally well, note a few areas for improvement, and provide practical takeaways you can apply to your own projects. Whether you’re a business analyst, product owner, or developer, this workflow offers a repeatable pattern for turning ambiguous requirements into actionable models.
Understanding the Problem: Saturn Int. Car Park Security System
Before diving into the tooling, let’s briefly recap the scenario. Saturn International wants to secure their employee car park by issuing identity cards. The system must:
-
Verify employee and guest cards at entry barriers
-
Automatically raise barriers upon successful validation
-
Display a “Full” sign when no spaces remain
-
Manage guest cards issued via reception with return policies
This is a classic access control problem with physical-digital integration—a perfect candidate for object-oriented modeling.
💡 Pro Tip: Always start by summarizing the problem in your own words. It forces clarity and helps identify edge cases early.
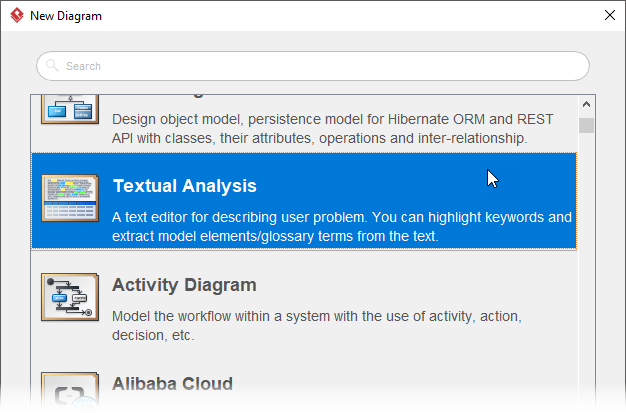
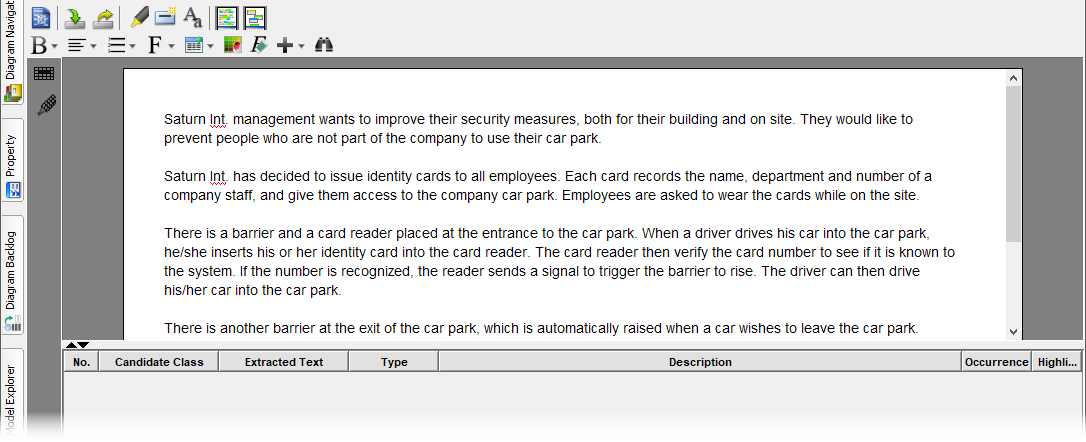
Step 1: Setting Up Textual Analysis in Visual Paradigm
The tutorial begins with creating a new project and a Textual Analysis diagram. Here’s how it flows:
-
Navigate to Project > New, name your project Tutorial, and select Create Blank Project
-
Go to Diagram > New, choose Textual Analysis, and name it Security Improvement
-
Paste the full problem description into the editor
My Experience: The interface is intuitive, and the editor supports standard clipboard operations (Ctrl-V). One minor suggestion: adding a “Paste from Clipboard” button directly in the toolbar would improve discoverability for new users.
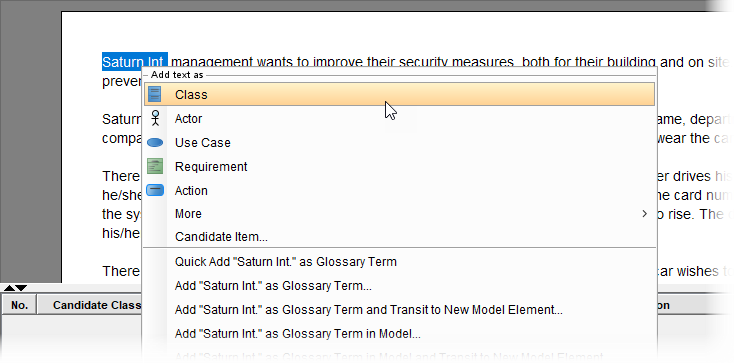
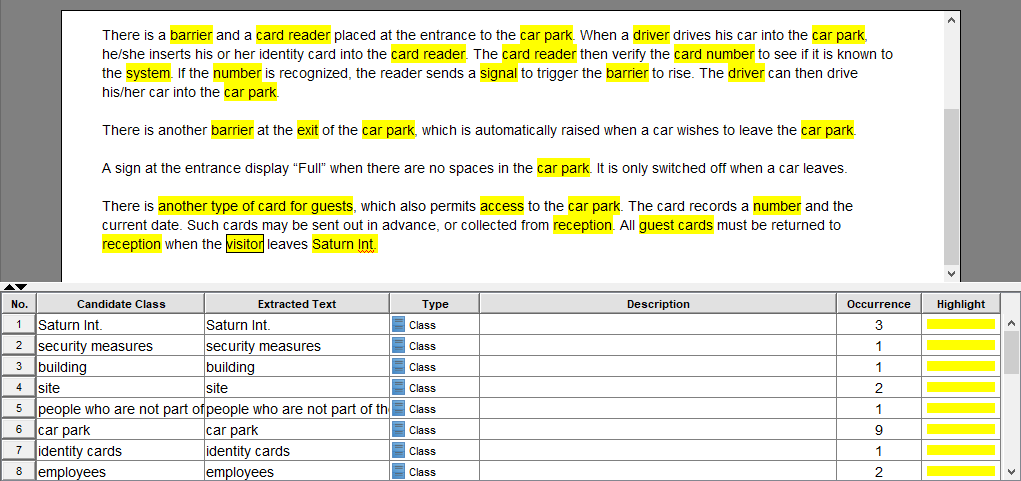
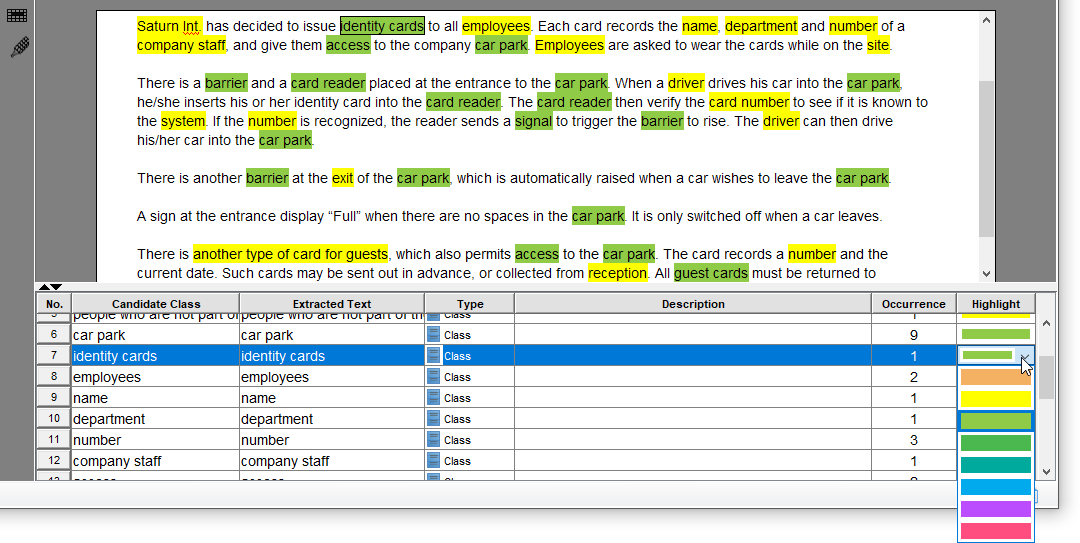
Step 2: Identifying Candidate Classes from Natural Language
With the text loaded, the next phase is extracting potential classes. The tutorial instructs users to:
-
Read through the description carefully
-
Right-click on meaningful noun phrases
-
Select Add text as Class from the context menu
This generated an initial list of 23 candidate classes, including:
-
Car park,Identity cards,Barrier,Card reader -
Name,Department,Number(later identified as attributes) -
Driver,Visitor,Company staff(later identified as roles)
What I Liked: The visual highlighting makes it easy to track progress. The ability to select text inline—without switching contexts—keeps the workflow fluid.
Step 3: Filtering and Refining Classes Using Rejection Rules
Not every noun deserves to be a class. The tutorial introduces seven rejection criteria:
| Rule | When to Apply |
|---|---|
| Duplicates | Multiple terms for the same concept |
| Irrelevant | Outside system scope |
| Vague | Lacks precise meaning |
| General | Too broad to be useful |
| Attributes | Properties of other objects |
| Associations | Relationships, not entities |
| Roles | Contextual identities, not core types |
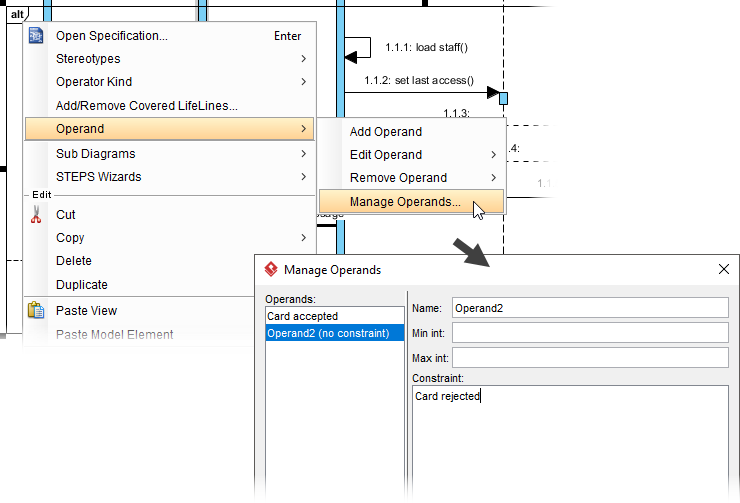
Applying these rules reduced our list from 23 to 7 accepted classes:
| Candidate | Decision | Reason |
|---|---|---|
Car park |
✅ Accept | Core system entity |
Identity cards |
✅ Accept → Staff card | Refined for clarity |
Access |
✅ Accept | Represents permission event |
Barrier |
✅ Accept | Physical control point |
Card reader |
✅ Accept | Input/validation device |
Signal |
✅ Accept | System trigger mechanism |
Guest cards |
✅ Accept → Guest card | Singular form consistency |
Critical Insight: This filtering step is where domain expertise matters most. I appreciated that the tutorial doesn’t just list rules—it shows how to apply them contextually. For instance, rejecting Driver as a “Role” rather than a class prevented unnecessary complexity.
Step 4: Rephrasing and Standardizing Class Names
Consistency matters in modeling. The tutorial recommends:
-
Using singular nouns (
guest cardnotguest cards) -
Clarifying ambiguous terms (
staff cardinstead of genericidentity cards)
| Original | Rephrased | Rationale |
|---|---|---|
identity cards |
staff card |
Specific to employee context |
guest cards |
guest card |
Singular form alignment |

Pro Move: I added a personal convention: prefixing hardware-related classes with HW_ (e.g., HW_Barrier) to distinguish physical from logical components. The tool accommodates this flexibility beautifully.
Step 5: Converting Text to Class Model Elements
With refined class names, it’s time to transform text annotations into formal model elements:
-
Multi-select the seven accepted classes (Ctrl+click)
-
Right-click → Create Model Element
-
Choose Create new diagram, name it Car Park System
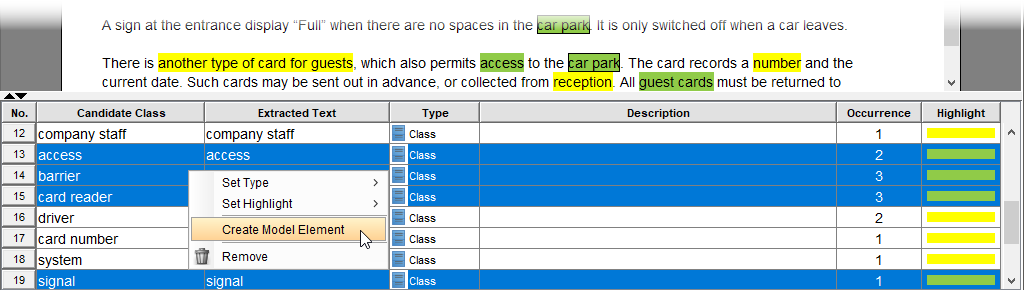
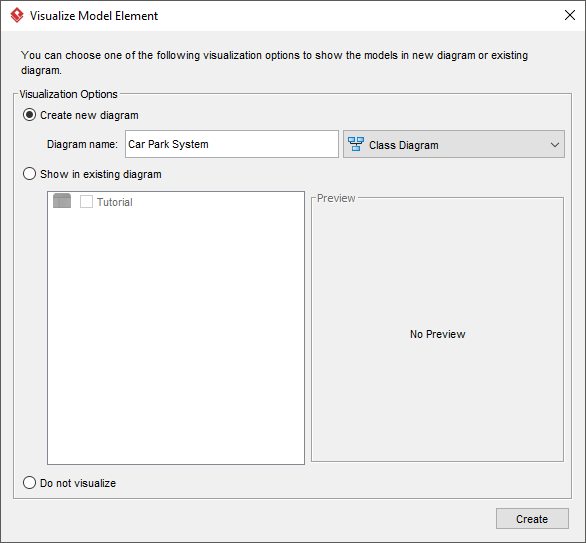
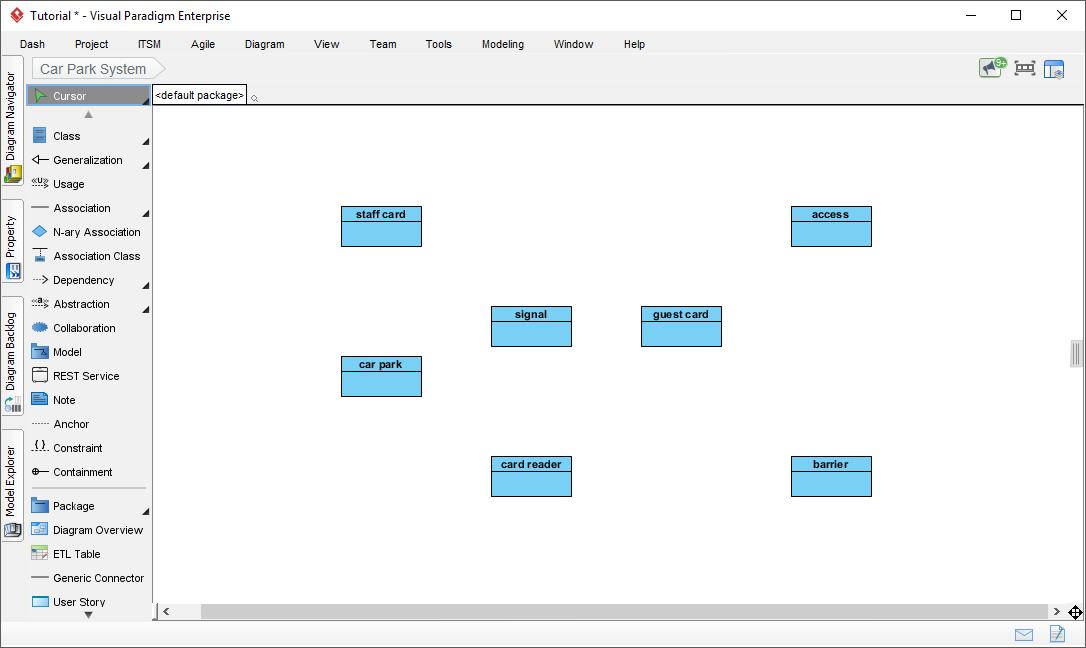
Workflow Win: The automatic diagram generation saved significant time. I particularly valued that the tool preserved my naming conventions without requiring manual re-entry.
Step 6: Developing Structural Relationships in the Class Diagram
A class list isn’t a model until relationships are defined. The tutorial demonstrates adding:
-
Generalization:
Staff cardandGuest cardinherit from abstractCard -
Association:
Card readerinteracts withBarrierviaSignal -
Dependency:
Car parkdepends onAccessrecords for capacity tracking
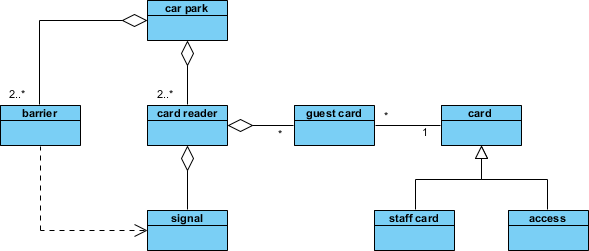
Design Insight: Introducing the abstract Card superclass was a masterstroke. It reduced duplication and made the model extensible—for example, adding Contractor card later would require minimal changes.
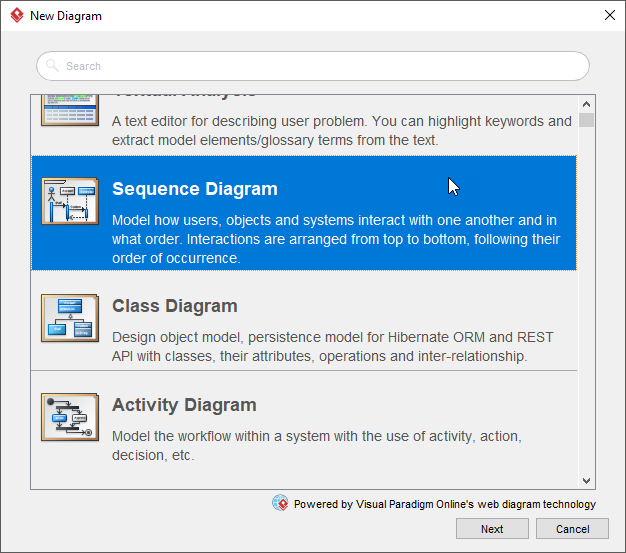
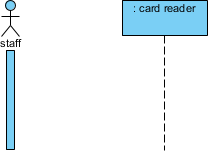
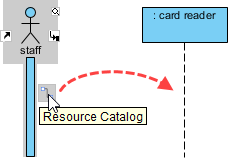
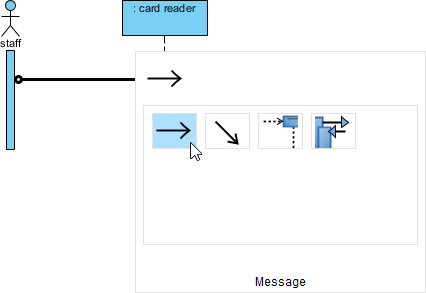
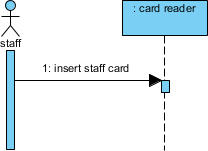
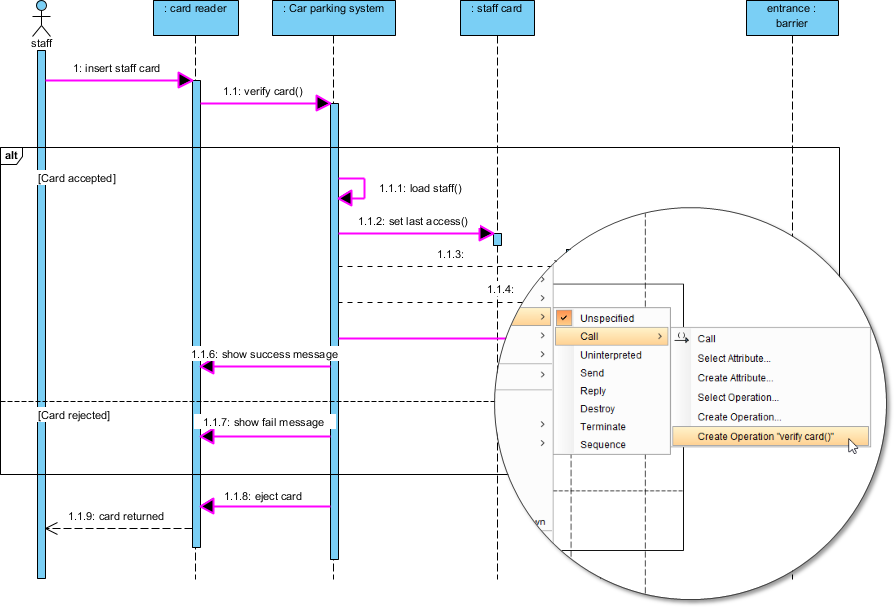
Step 7: Building Interaction Models with Sequence Diagrams
Static structure tells half the story. To model behavior, we create a sequence diagram for the “Staff Entry” scenario:
-
Diagram > New > Sequence Diagram → Name: Car parking (With staff card)
-
Add actor
Staffand lifelines for:card reader,car parking system, etc. -
Model message flow:
insert staff card→verify card()→ conditional handling
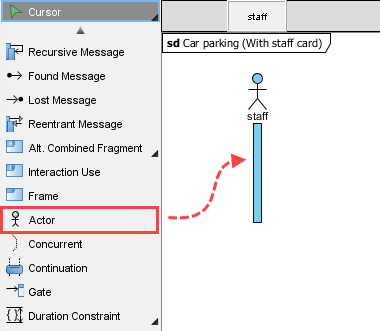

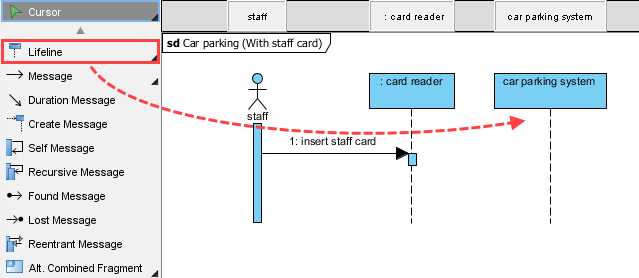

Advanced Technique: Using an Alternative Combined Fragment (alt) to model success/failure paths:
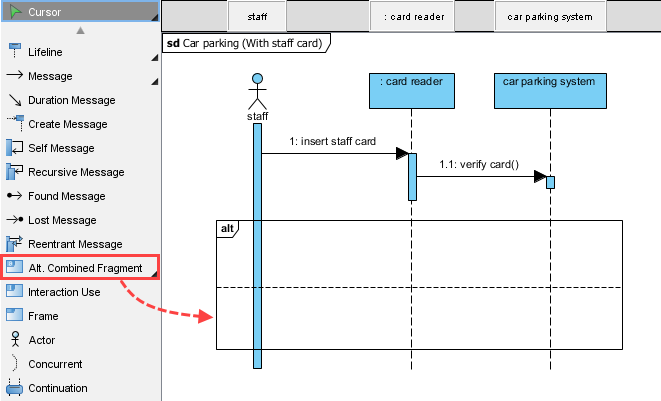
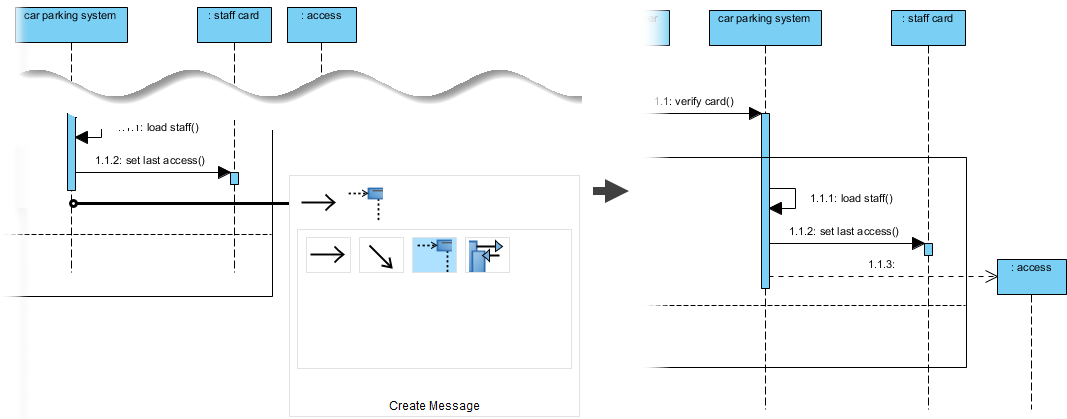
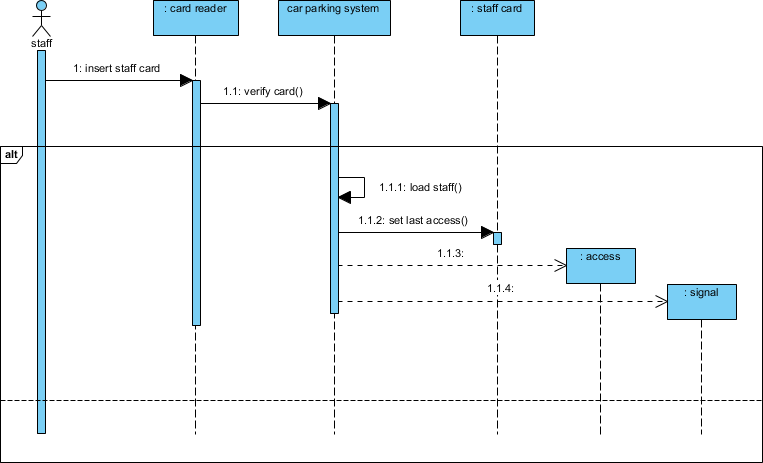
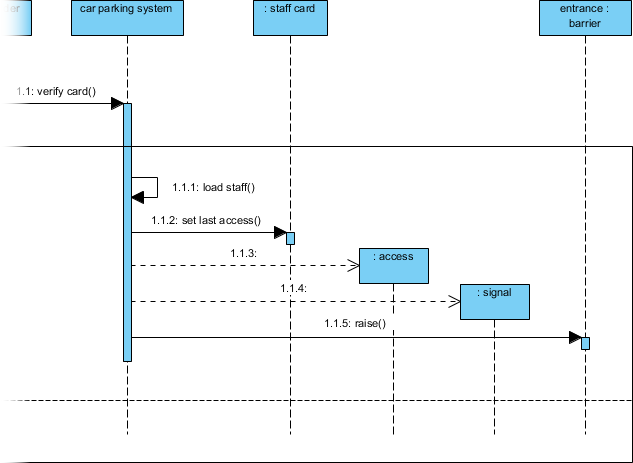
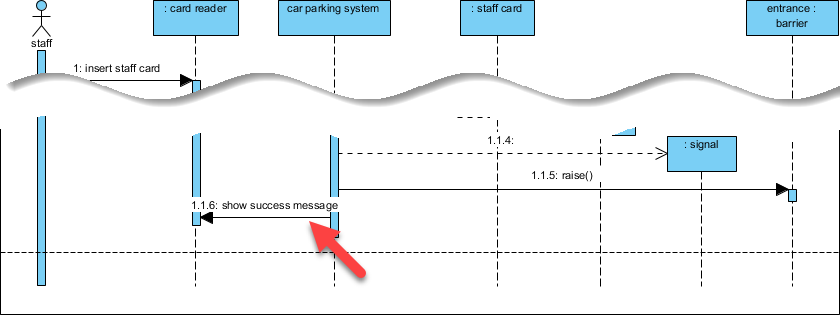


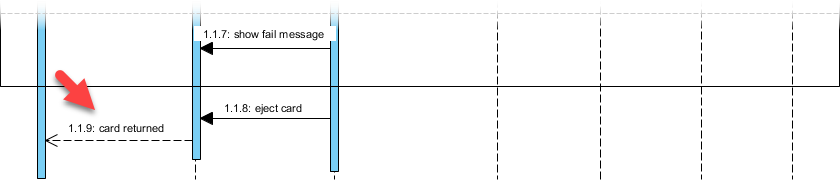
My Takeaway: The visual modeling of conditional logic with alt fragments made complex flows immediately understandable to non-technical stakeholders—a huge win for cross-functional alignment.
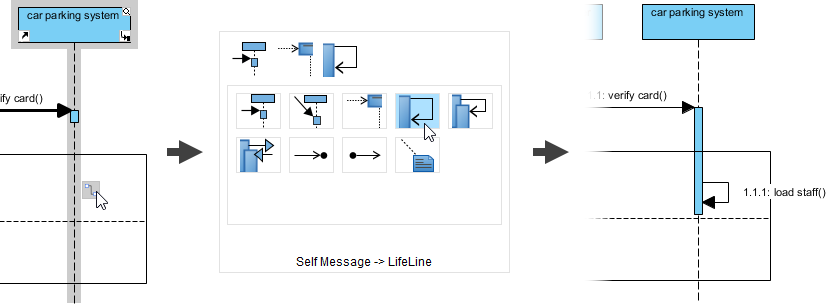
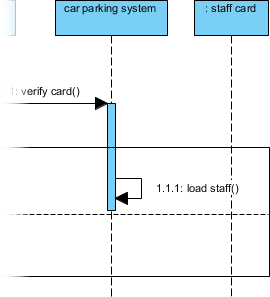
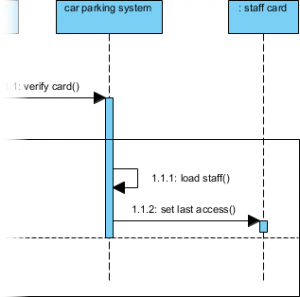
Step 8: Extracting Operations and Attributes from Interactions
The final refinement step converts sequence messages into class operations:
-
Right-click lifeline → Class > Create Class “car parking system”
-
For each message, right-click connector → Type > Call > Create Operation
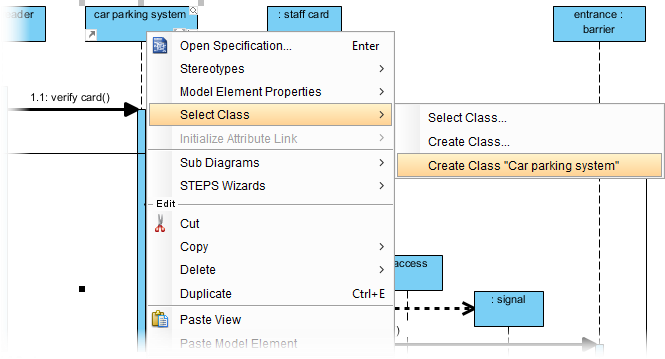
Returning to the class diagram reveals auto-populated operations:

Power Feature: This bidirectional synchronization between sequence and class diagrams ensures model consistency. Change a message name in one view, and it updates everywhere—a time-saver for iterative design.
My Experience: What Worked Well and What Could Be Improved
✅ Strengths
-
Guided Discovery: The step-by-step filtering process teaches critical thinking, not just tool mechanics
-
Visual Consistency: Color-coding accepted/rejected classes reduced cognitive load
-
Model Synchronization: Changes propagate across diagrams automatically
-
Realistic Scenario: The car park example balances complexity with accessibility
⚠️ Areas for Enhancement
-
Attribute Detection: The tool could suggest attributes (e.g.,
cardNumber,issueDate) during class creation -
Template Library: Pre-built rejection rule templates for common domains (IoT, healthcare, finance) would accelerate onboarding
-
Collaboration Features: Real-time co-editing for distributed teams would modernize the workflow
🎯 Practical Takeaways for Your Projects
-
Start textual analysis early—don’t wait for “perfect” requirements
-
Involve domain experts during class filtering; their intuition catches edge cases
-
Iterate models incrementally; one sequence diagram at a time prevents overwhelm
-
Document rejection decisions; they become valuable rationale for future architects
Conclusion: Turning Words into Working Systems
Visual Paradigm’s Textual Analysis tutorial delivers more than tool instruction—it teaches a disciplined mindset for requirements engineering. By methodically transforming natural language into classes, relationships, and interactions, teams can reduce ambiguity, catch design flaws early, and create models that truly reflect business intent.
As software systems grow increasingly complex, the ability to extract structure from prose isn’t just useful—it’s essential. This workflow won’t replace deep domain analysis or stakeholder collaboration, but it provides a robust scaffold upon which to build them.
Whether you’re modeling a car park access system or a distributed microservices architecture, the principles remain the same: listen carefully, question assumptions, model deliberately, and iterate relentlessly.
Give this approach a try on your next project. You might be surprised how much clarity emerges when you let the text guide the model—not the other way around.
References
- Textual Analysis Software: Visual Paradigm’s Textual Analysis tool enables you to document project requirements in a rich-text editor and extract structured model elements—such as actors, use cases, classes, and glossary terms—from unstructured problem statements. Features include candidate highlighting, candidate pane view for spatial organization, and AI-powered extraction to bridge requirements and design workflows.
- A Practitioner’s Guide to Mastering Visual Paradigm’s Textual Analysis Tool: A hands-on, practitioner-focused guide sharing real-world techniques for transforming stakeholder interviews and unstructured notes into glossaries, candidate model elements, and clean UML diagrams using Visual Paradigm’s Textual Analysis feature. Includes pro tips on color-coding, alias management, and iterative refinement.
- How to Use Textual Analysis?: Step-by-step tutorial demonstrating how to import a problem statement (OTV broadcasting services example), identify candidate actors and use cases through text highlighting, refine candidate properties, and generate a visual UML Use Case Diagram directly from textual analysis.
- AI Textual Analysis – Transform Text into Visual Models Automatically: Explores Visual Paradigm’s AI-powered Textual Analysis that automatically converts natural language problem descriptions into structured UML Class Diagrams. Covers candidate class extraction, attribute/operation suggestion, relationship mapping, and final diagram generation using a Student Registration System example.
- UML Tutorial: From Problem Description to Models: Comprehensive tutorial showing how to apply Textual Analysis to a car park security system problem description. Walks through identifying candidate classes, applying rejection rules, rephasing terms, creating class model elements, and developing interaction models via sequence diagrams.
- Textual Analysis – User Guide: Official Visual Paradigm user guide documentation detailing the Textual Analysis feature: rich-text problem statement editor, candidate object extraction, glossary term identification, highlighting tools, and integration with model elements and diagrams.
- AI-Powered Textual Analysis: Feature overview of Visual Paradigm’s AI-enhanced Textual Analysis that leverages natural language processing to automatically identify and map candidate model elements from unstructured text, accelerating the transition from requirements documentation to actionable architectural models.
- Candidate Pane View – User Guide: Documentation explaining the Candidate Pane View interface, which displays extracted candidate model elements as movable visual blocks. Covers filtering by model type or highlight color, spatial arrangement, tile layout, and synchronization with the grid view for efficient candidate organization.
- Building Data Dictionary from Textual Analysis: Tutorial on extracting key terms from problem statements to build a project glossary or data dictionary. Demonstrates adding terms to the glossary, defining aliases and descriptions, and maintaining traceability between source text and documented terminology.
- AI Toolbox: Textual Analysis for Software Modeling: Web-based AI application within Visual Paradigm’s AI Toolbox that allows users to input unstructured text and automatically identify entities, concepts, and relationships to generate structured software models and UML diagrams without manual extraction.
- What’s the purpose of the Textual Analysis feature? – Community Forum: Community discussion thread where Visual Paradigm users share questions, use cases, and practical insights about applying the Textual Analysis feature for requirements engineering, model discovery, and team collaboration.
- Forming Diagram from Candidate Objects – User Guide: Official documentation on converting candidate objects identified through Textual Analysis into actual model elements and visualizing them directly in UML diagrams via drag-and-drop from Model Explorer or the Create Model Element workflow.
- Visual Paradigm Textual Analysis Tutorial – YouTube Video: Video tutorial demonstrating Visual Paradigm’s Textual Analysis feature in action: importing text, highlighting candidate elements, refining properties, and generating diagrams. Ideal for visual learners seeking a quick walkthrough of the workflow.